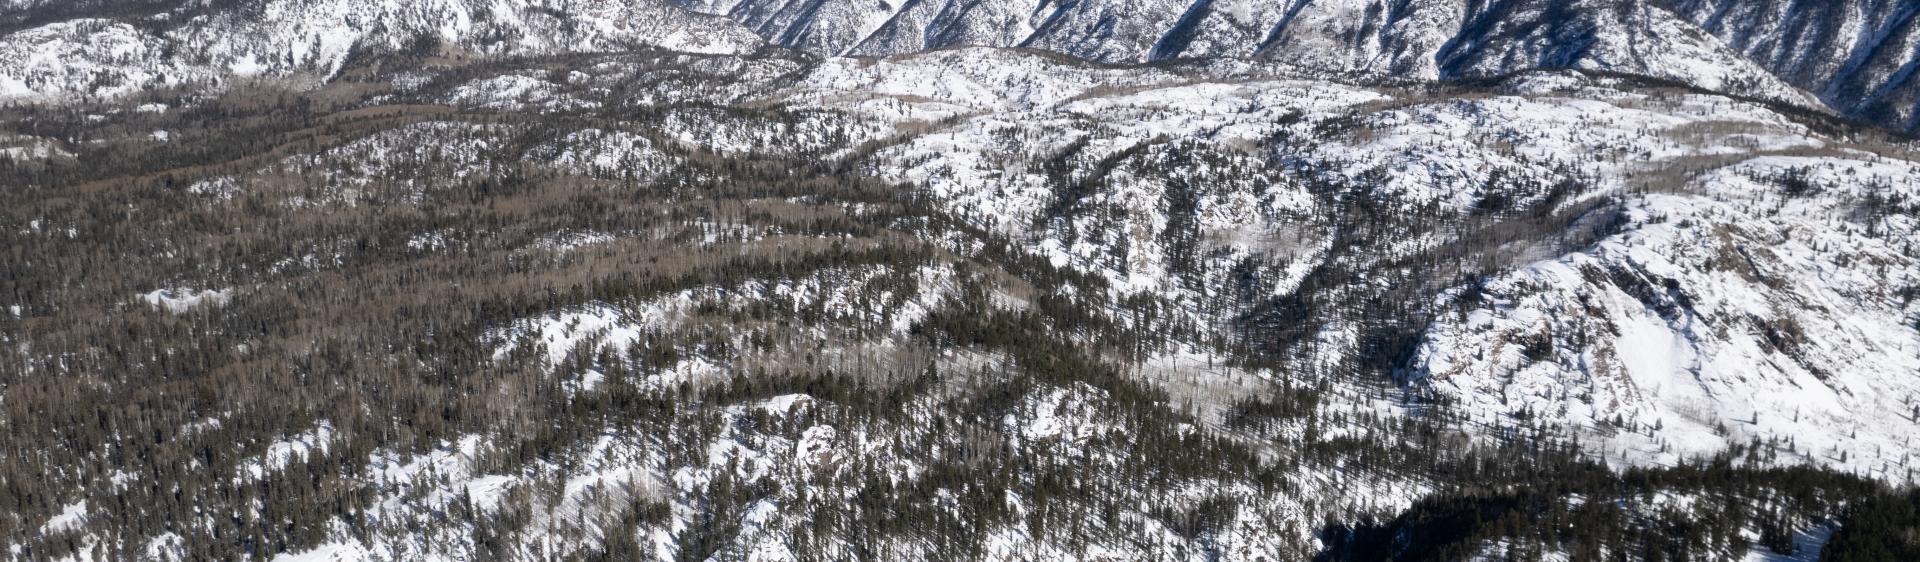
It’s no surprise that Durango, Colorado is a hotspot for landscape and mountain photography. With scenes of mountains, rugged mesa, alpine lakes and rivers, Durango is a landscape photographer’s dream come true.
But we all can’t be Ansel Adams!
Landscape photography can seem intimidating so we’ve created a guide with tips and tricks on how to shoot landscape and mountain photography in Durango and La Plata County:
Our favorite places for landscape photography
Before we talk about gear and techniques, it’s worth mentioning our favorite locations to shoot. Durango is home to a variety of landscapes and terrains, perfect to test your ability to shoot in a number of environments and lighting situations. Some of our favorite places to shoot include:
La Plata Canyon
Local photographer Hayden Kast is particularly fond of shooting in the La Plata Mountains. Why? Kast says, “I like these because of the unique location. You can look to the south and see the deserts of New Mexico, look to the west and you can see the La Sal Mountains/Moab in Utah, look north and see the rugged San Juans, and to the east, you can see our home in Durango!”
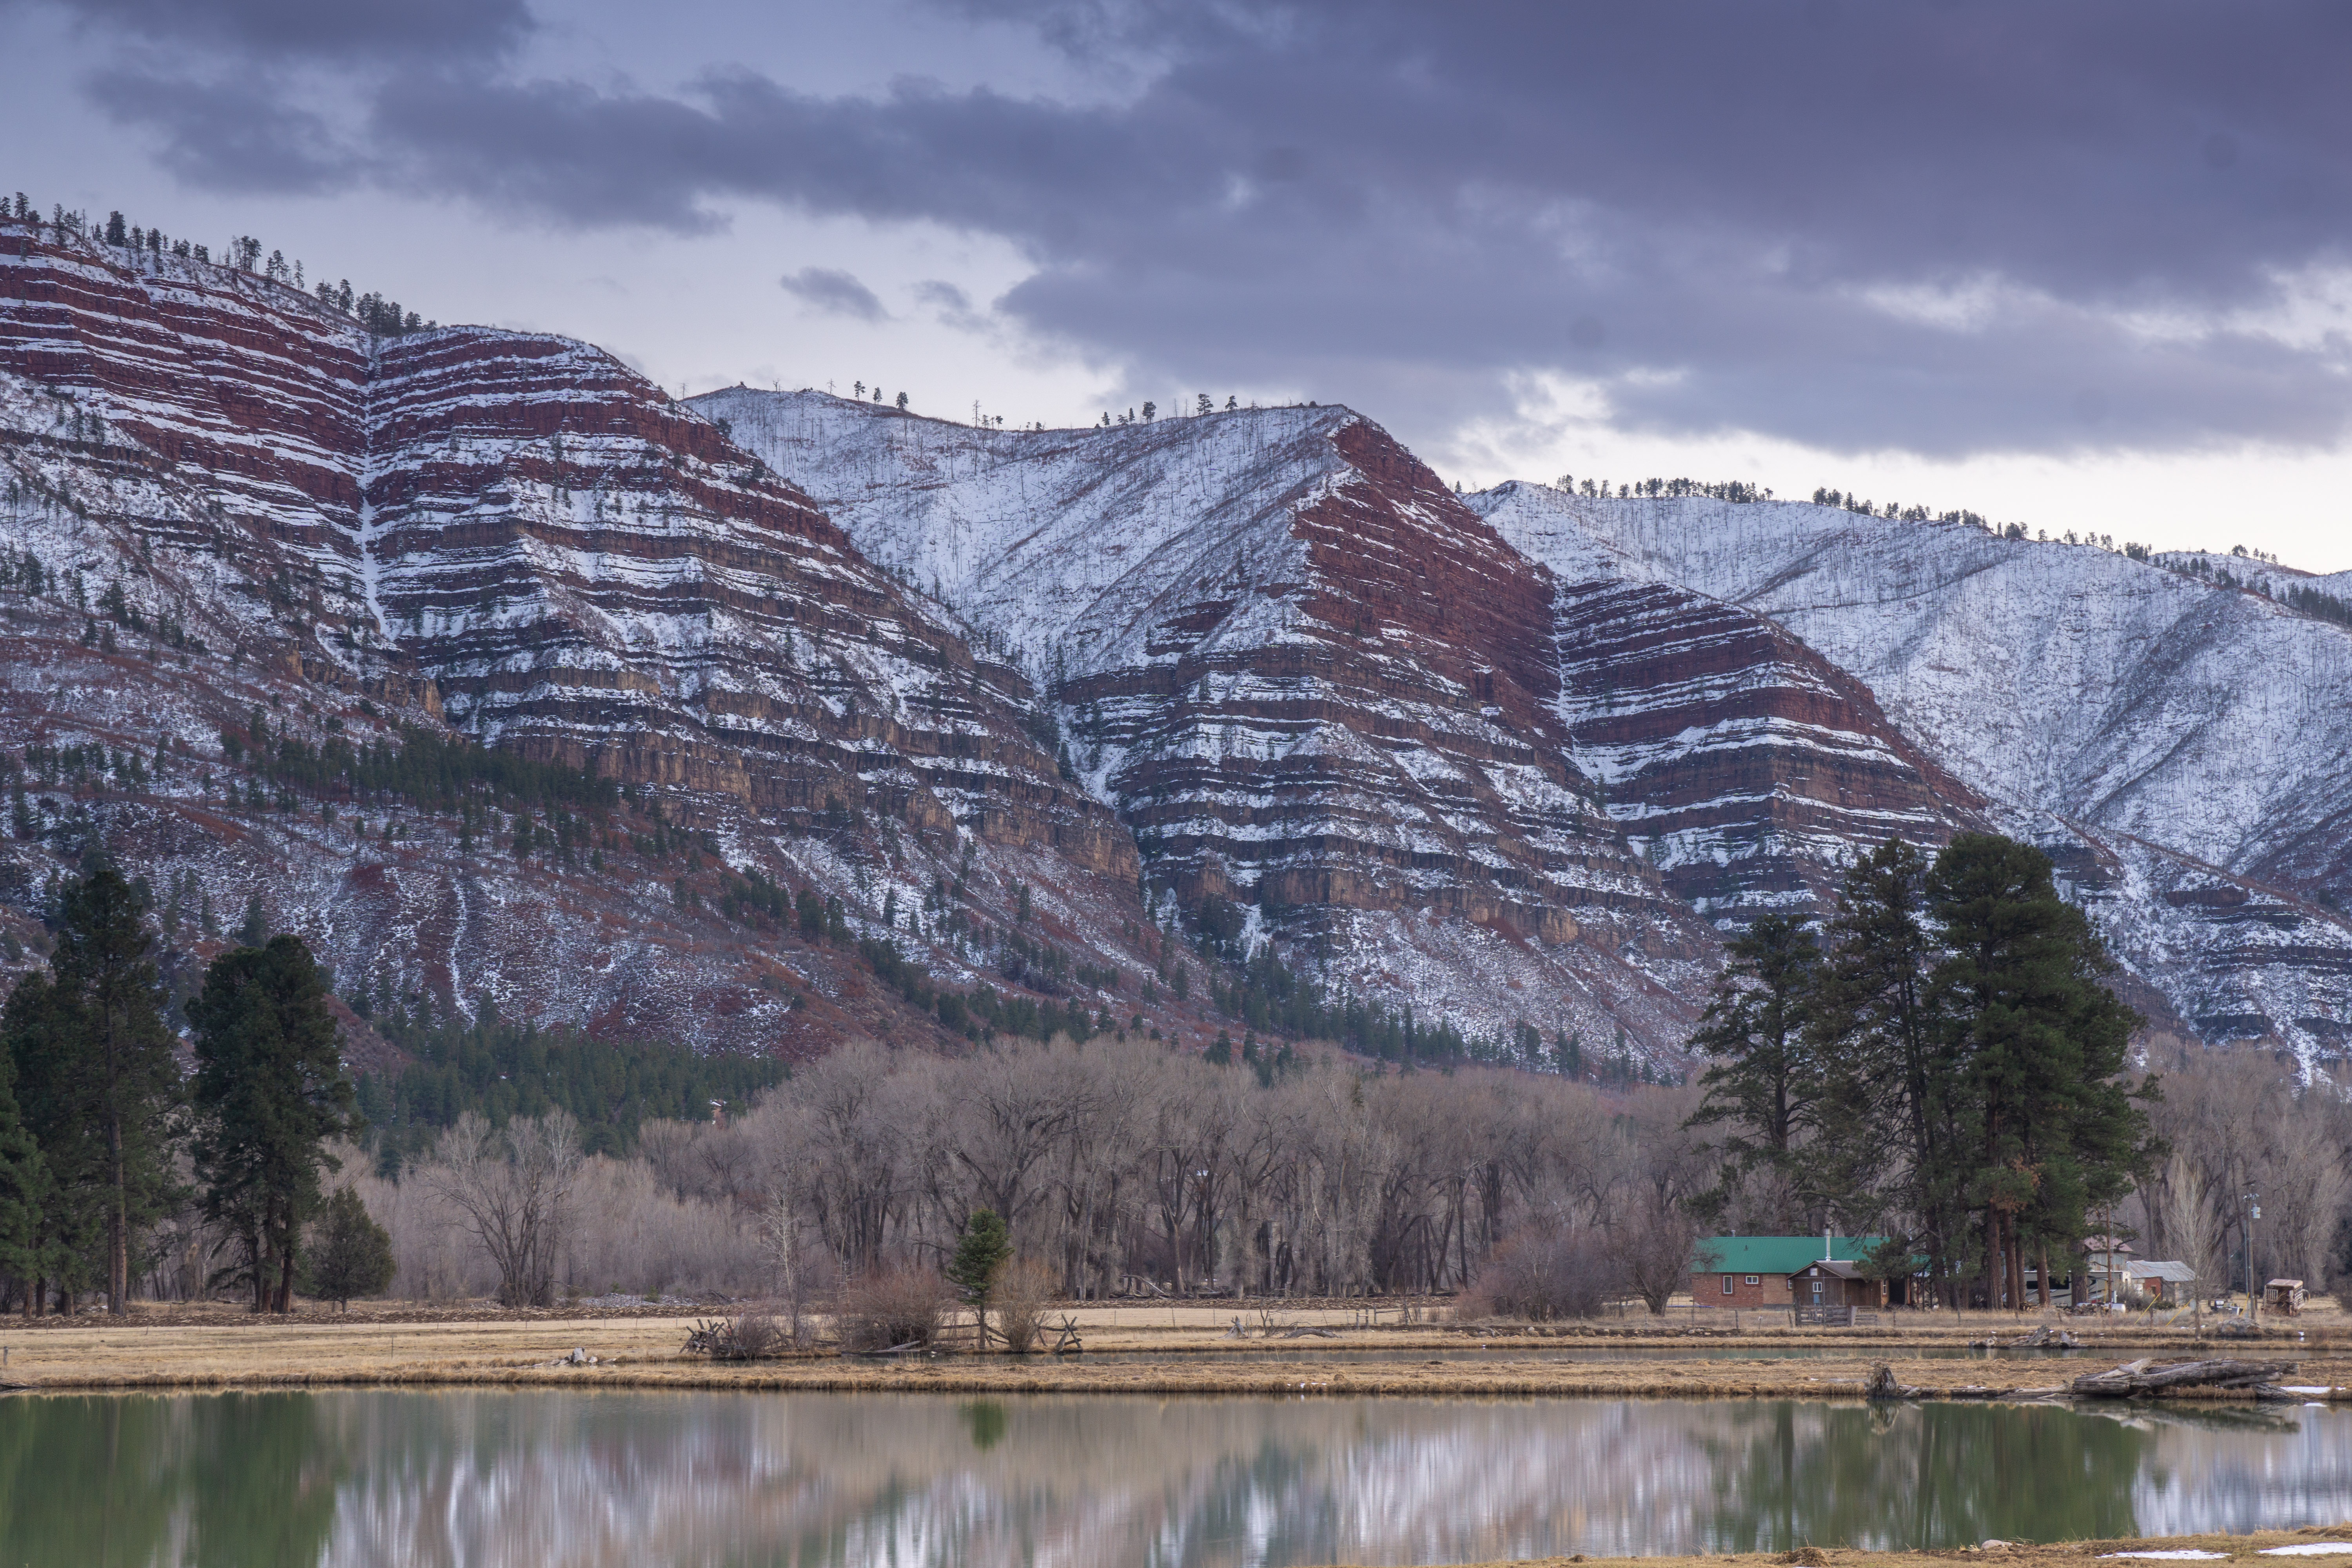
Vallecito Reservoir
Local photographer Tyler Brown heads out to Vallecito to shoot regularly. He says, “In the early morning, the lake's water carries really awesome reflective color and with the two peaks in the background it is a truly amazing place.”
Along the San Juan Skyway
Up for a drive? Pack your camera and hiking shoes as well. The skyway and million-dollar highway offer great views from the road, but even better ones if you’re willing to take a small hike. Locals say, “It is the best place to see the aspens change in the fall” - Hayden Kast. Tyler Brown agrees and says, “Up and down 550 is about as scenic as it gets and now that the sun has melted a bit when the sun sets the peaks to carry a more reddish color that is really incredible.”
Weminuche Wilderness
The largest designated wilderness in Colorado offers views that will be sure to take your breath away and leave your finger trigger happy while trying to take photos. Another favorite from some of our local photographers because “it is so far off the beaten path…,” says Kast.
While these locations are just a sample of what La Plata County has to offer, any of these are great to capture the essence of Durango and the surrounding areas.
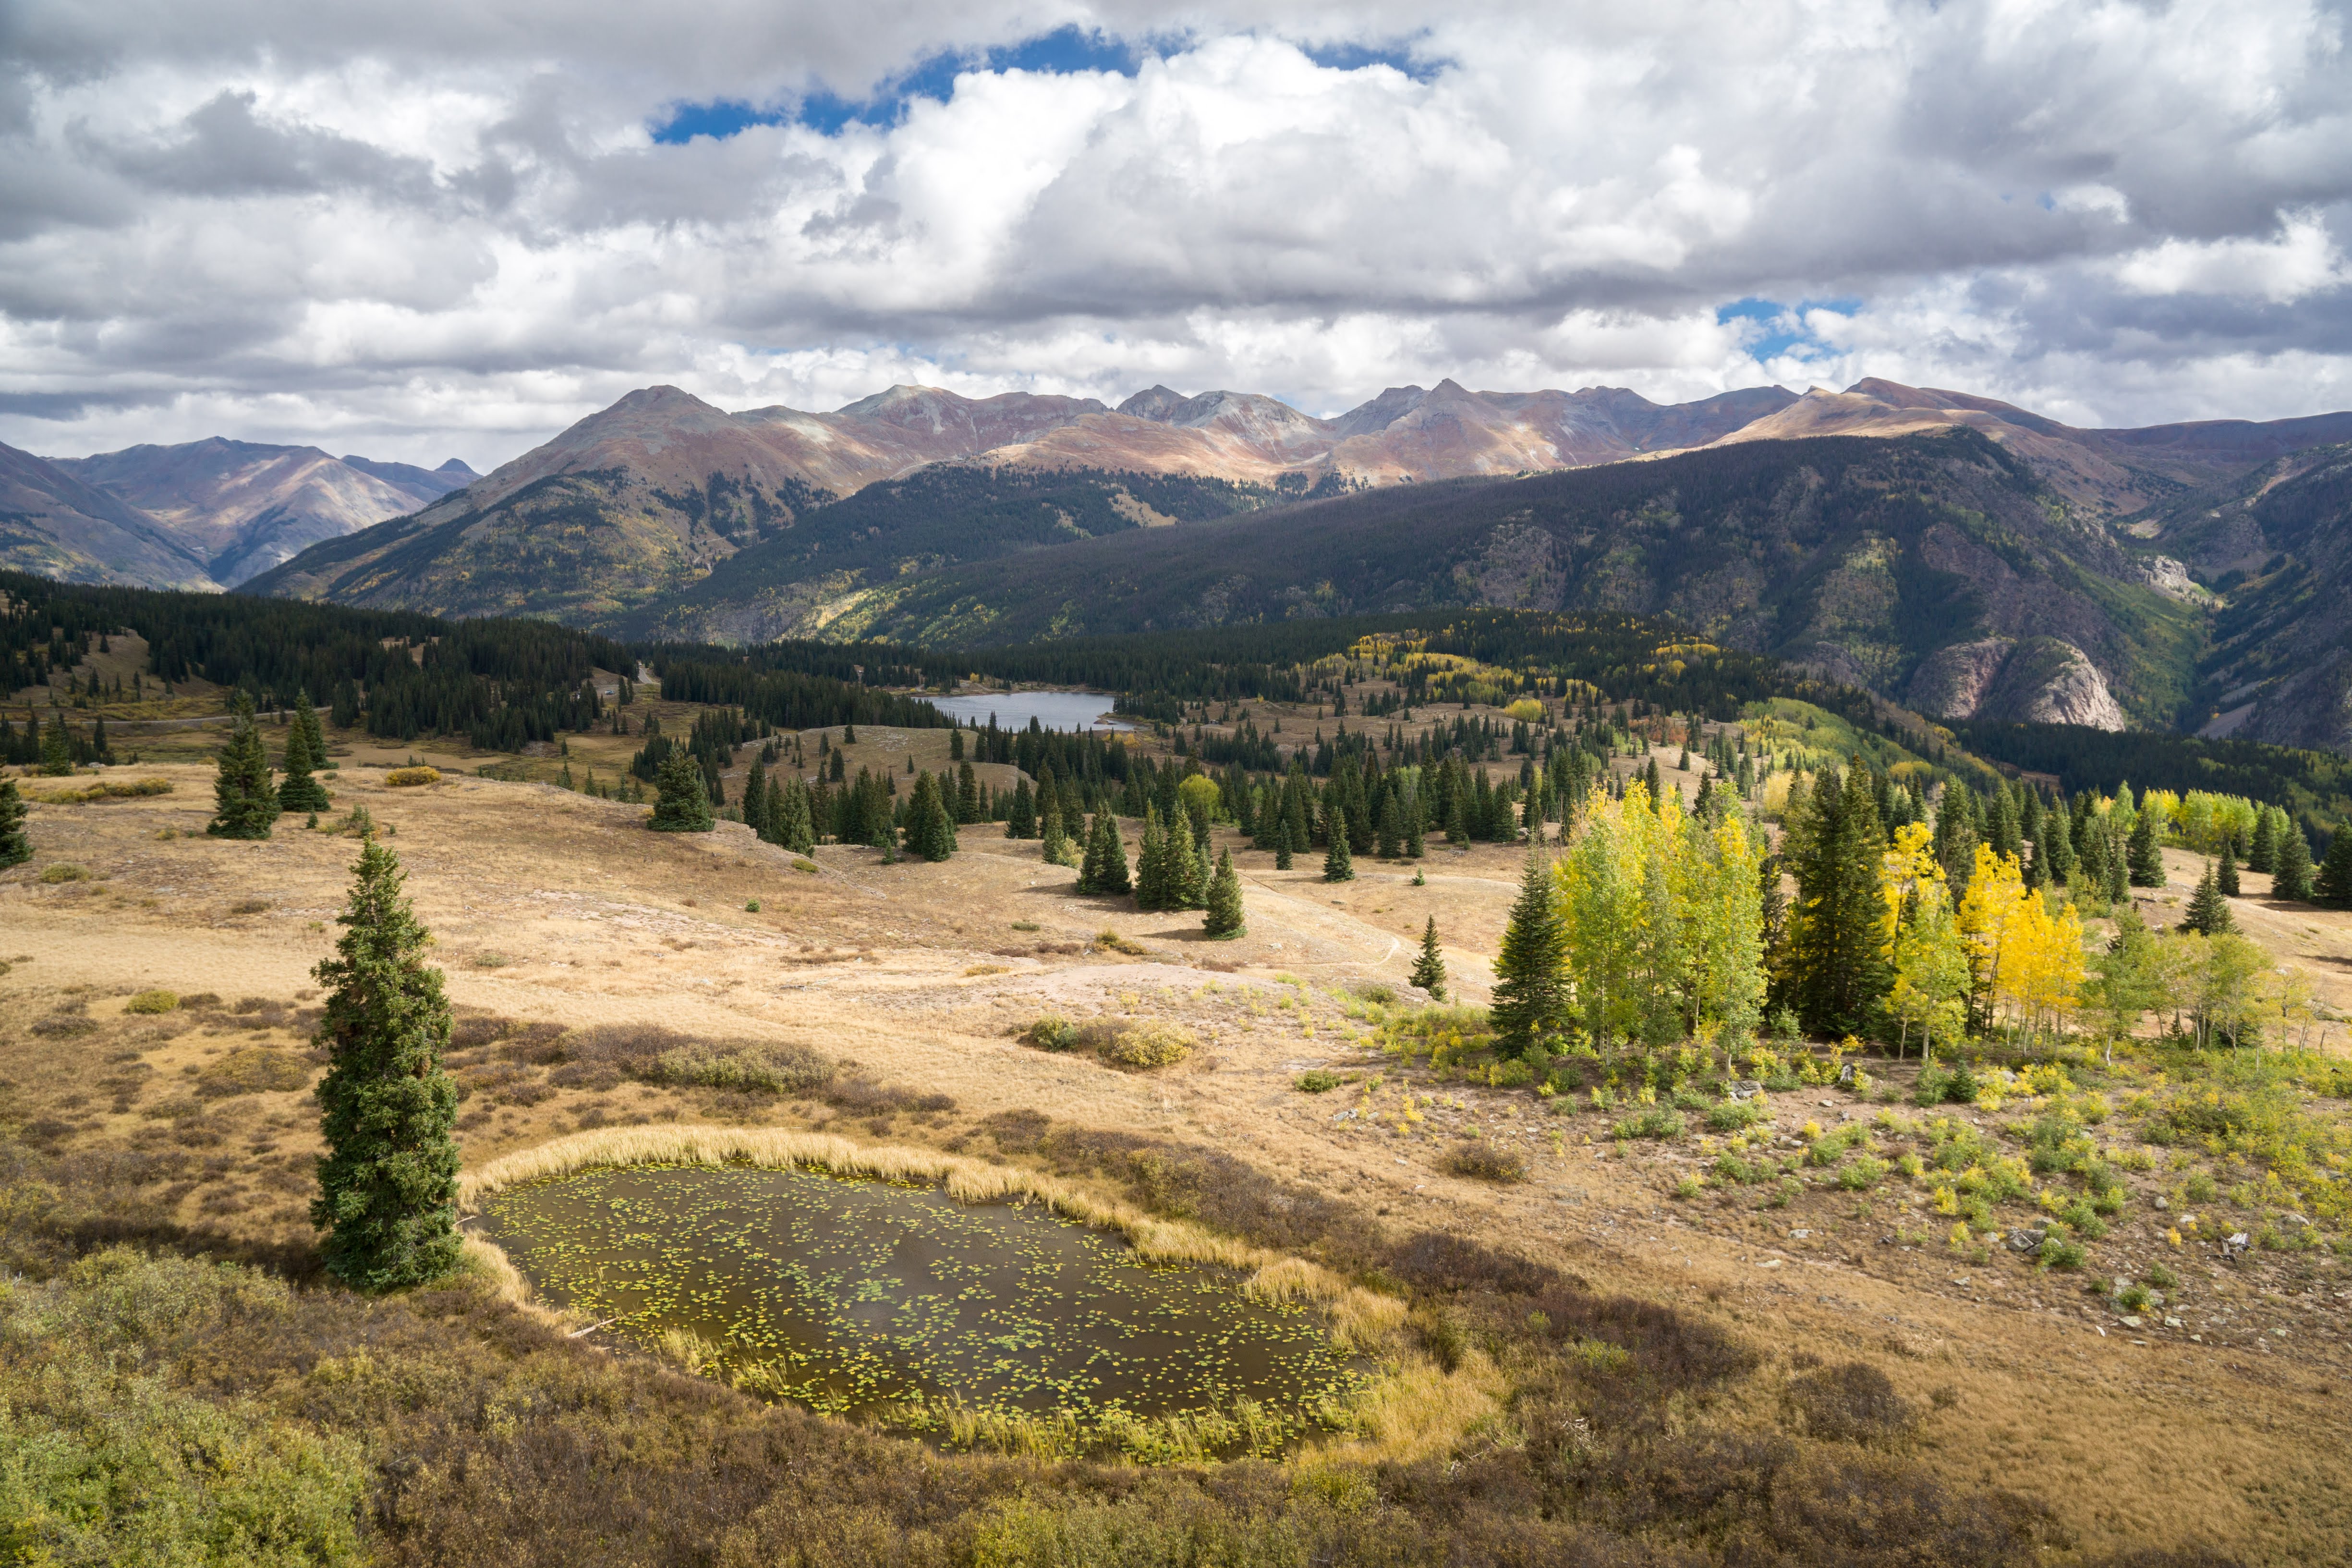
Essential equipment
Depending on your skill level (and budget), your landscape photography gear will vary. However, there are essential pieces of equipment that we recommend using no matter what.
Tripod
Probably the most important piece of gear in your arsenal, a tripod can make or break your shot. Because landscape photography in Durango deals with subjects like distant mountains, forests, and alpine lakes, the subjects are just too far to hand-hold your camera and get a sharp image at the same time.
In addition, most landscape photos require long shutter speeds. We recommend investing in a solid, well-built tripod and use it every time you go out to shoot.
Don’t go cheap with a tripod! If you buy cheap, you’ll buy twice.
Circular polarizer
An often overlooked piece of gear, a circular polarizer can improve your landscape photography skills overnight. Circular polarizers are a type of filter that does a number of things:
- Eliminates glare on water, clouds, snow, and other reflective surfaces
- Enhances the richness of the sky
- Enhances the saturation of the leaves of trees and plants
Wide-angle lens
A fairly obvious gear piece, a wide-angle lens puts the entire landscape within the frame of your camera and is perfect for many of the mountain scenes found throughout Durango. There’s nothing worse than not being able to capture an entire mountain range in a photo -- wide-angle lenses fix that!
These lenses are also great for capturing both a foreground and background all in one photo.
Telephoto lens
Telephoto lenses are a great addition to your landscape photography gear collection. While you may only use a telephoto lens 10% of the time, it’s great when focusing on a specific feature in the landscape.
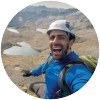
See an interesting pattern on Potato Hill? See a pack of yellow-leaf trees amongst green pines? See an elk grazing in a field? A telephoto lens is your go-to lens for all of those scenarios.
Adobe Photoshop or Lightroom
There’s an old saying, “If you can’t get the photo you want in the field, you shouldn’t be shooting.” While this mantra may be true for professional photographers, it’s a little too “purest” and unrealistic for the aspiring landscape photographer.
Mistakes happen when shooting landscapes! You may have forgotten your circular polarizer, used the wrong shutter speed, or put your finger directly on the lens -- things happen!
This is why we highly recommend using photo-editing programs to polish your landscape photos post-shooting. The two most common ones are Adobe Photoshop and Lightroom. Relatively easy to use, these programs are great for correcting any mistakes that occurred in the field.
Photoshop is great for editing a single photo in extreme detail while Lightroom is great for editing a large number of photos in a single sitting.
If you’re trying to edit out your finger in a photo, use Photoshop. If you’re trying to edit 100 photos of a sunset of Hogsback, use Lightroom.
What are the local pros using?
Hayden Kast: “I use a Panasonic GH5 camera, and love it! I also use a DJI Mavic Air drone, this can give different perspectives that are impossible to get otherwise. I would say iPhones can get the job done nowadays, but I consider my GH5 essential when I go out. I also use Final Cut Pro to edit film and Adobe Lightroom for photos.
Tyler Brown takes a slightly different approach when it comes to cameras. He says, “I tend to carry light when I am shooting. I am a firm believer that it isn't the gear you have that makes a difference, it's how you take the picture. If you understand your camera and the time of day you're shooting, you can create awesome photos regardless of the type of gear. I use a Nikon d3500, my iPhone (using the Manual App), and a cheap four-foot tripod from Walmart.”
Times to shoot
Shooting Durango’s landscapes and mountains in different parts of the day will create varying images. Even if it’s the same scene, a morning photo will look dramatically different than an evening one.
Sunrise and morning
Sunrise and morning photography is great for capturing the western side of Durango. The blue-tinted light will illuminate the mesas and mountains with a soft, blue hue.
Afternoon
Often called “photographer’s naptime,” shooting in the afternoon produces photos that are lack-luster compared to other times of the day. The direct, hot sun can cause harsh shadows and make Durango’s landscape and mountains look flat.
If you are interested in shooting during the afternoon consider black and white photography of the mountains instead. The harsh shadows can produce a dramatic contrast that will give your photos an Ansel Adams look and feel.
“Golden hour”
Golden Hour is typically defined as the last hour of light before sunset. Because the light is soft, warm, and the sun sits low in the sky, Golden Hour can create beautiful images with lots of texture and depth, all with a golden glow.
For Golden Hour in Durango, turn east to capture the warm light over the mesas.
Sunset
Landscape photography during sunset is a photographer’s bread and butter. Full of color, depth, and long shadows, Durango is a magical place during sunset. Turn west towards the La Platas to capture the deep colors of the clouds against the mountains.
Night
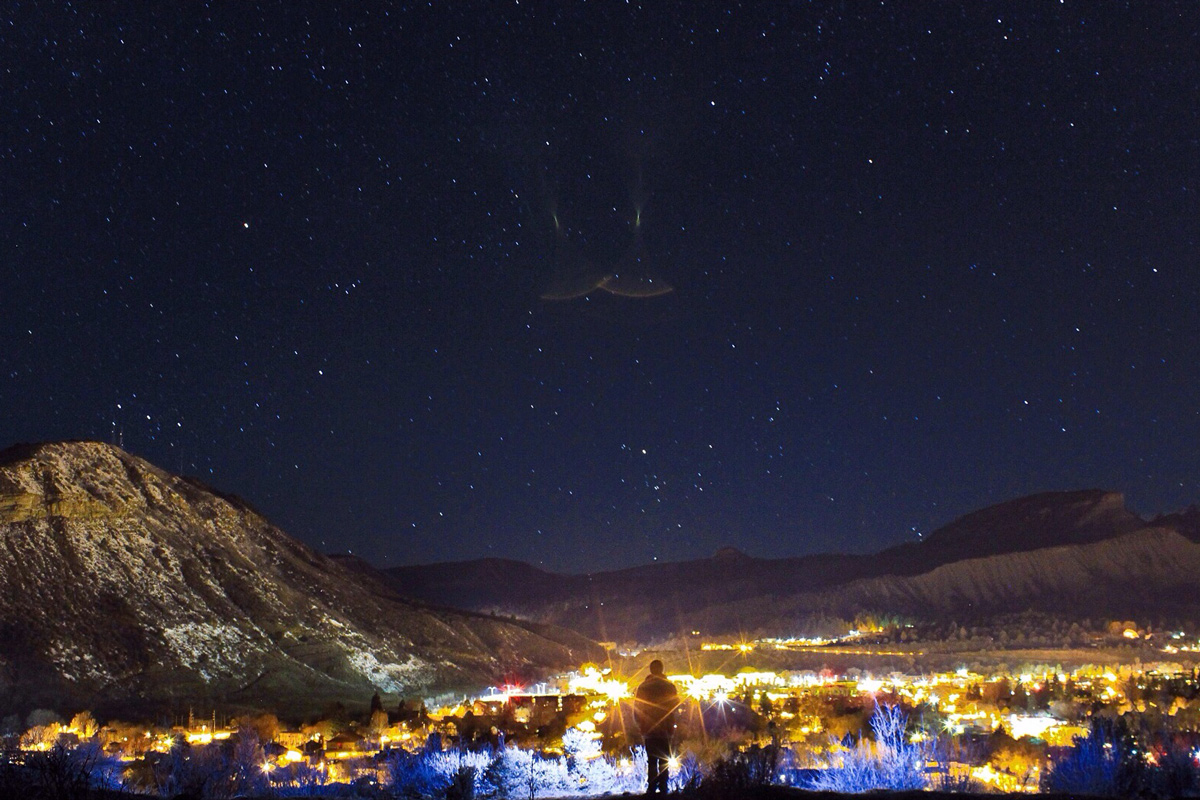
Night landscape photography is often overlooked as a time of day to shoot. While night photography can be challenging for beginners, it presents a great opportunity for stunning photos.
Star trails and photos of the Milky Way are two of the most common types of night shots. Star trails require at least a half-hour of an open shutter; sometimes up to four hours. On the other hand, shots of the Milky Way can be done in a matter of minutes.
Shooting night photography is great no matter where you go in Durango. For beginners, consider shooting the city from the Rim Trail next to Fort Lewis.
Tips for taking the perfect landscape photo
While landscape photography is a lifelong passion that takes years to master, there are several tips and tricks that can help you improve your photography skills overnight. To shoot better landscape and mountain photos in Durango consider these tips:
Use the manual mode
Don’t use the auto exposure setting- learn to use the manual mode. While it’ll take some getting used to, you’ll be able to get the exposure more accurate.
Learn how to use your white balance settings
Don’t use the auto white balance setting -- use presets (like “Sunny”) or learn to use the Kelvin temperatures, and you’ll get much better results.
Use the “rule of thirds”
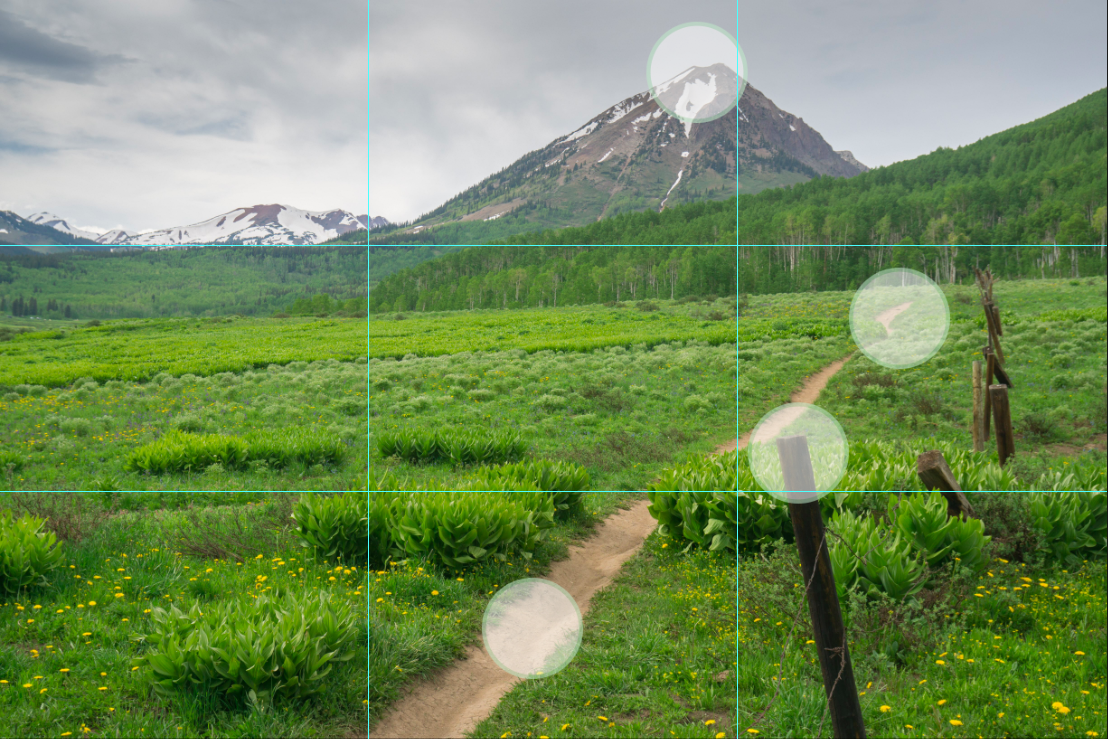
When looking through the viewfinder, picture your frame broken into 3x3 boxes. Place your subject into one of the thirds: left third, right third, top third, bottom third. This helps draw your eye deeper into the photo rather than placing the subject in the center of the frame.
“Invest in glass”
A common photographer saying that translates to, “Invest more money into your lenses rather than the camera itself.”
Cameras depreciate in value quickly compared to lenses. In addition, a high-end lens will produce exponentially better photos than a cheaper lens.
Camera quality matters but not as much as the lens.
“Capture the leaf, the tree, and the forest”
Landscape photographers can often get caught up trying to capture an entire mountain scene at the expense of missing out on other aspects. They may have missed the patch of flowers or the little bubbling spring.
When you go out shooting, take photos of smaller objects (leaf), medium scenes (tree), and the entire scene (forest). This ensures that you won’t miss out when you’re out shooting.
Kast recommends, “Find a subject in the photo (this could be a person, a mountain, a tent, a bike, anything really!) Use them to frame your photo and it will give more definition and life to your photo.”
Take only pictures, leave only footprints
One of the most important tips we can offer -- please treat the outdoor landscape and mountains of Durango with care and respect. We want to make sure that all visitors, future photographers, and our little furry-friends can enjoy Durango’s outdoor space as much as you will.
Conclusion
Durango is one of the best places in Colorado for an aspiring landscape photographer. With mountains and mesas in every corner, blue alpine lakes, and acres of trees, Durango is an incredible place to take your landscape photography to the next level.
Durango offers plenty of opportunities to practice at every turn!